

What is WooCommerce?
WooCommerce is an e-commerce plugin that extends from WordPress and aims to provide a complete range of e-commerce solutions for online merchants using WordPress.
How to install WooCommerce?
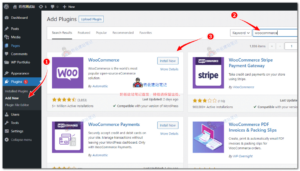
Step 1: Enter the WordPress backend, find the “plus in” option in the left menu, then directly enter WooCommerce in the search bar, click “Install Now” and enable it.
Step 2: After the plugin is enabled, the interface will automatically enter the WooCommerce settings guide, where you only need to fill in the relevant information according to the prompts. After completion, you can see the information you just filled out in “WooCommerce” ->”Settings”.
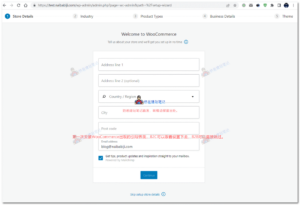
After the first installation and activation of WooCommerce, you will be redirected to the setup guide interface. If you are a B2C user, simply follow the guide to complete the setup. If you are a B2B user, just skip it.
After successful installation, the next step is to make more detailed settings for our e-commerce website, such as:
Product: Used to set the visual design and information display effect of the “product page”. Usually, if there are no special requirements for the “product page”, the “preset” option can be directly used; Other settings will be filled in according to the actual situation of the product.
Shipping method: After setting the shipping area, shipping options, shipping category, and other information, the system will present the actual shipping cost based on the shipping address and method filled in by the customer.
Payment settings: There are four default payment methods in the system, namely bank transfer, check payment, cash on delivery, and PayPal. Users can activate the cash flow service as needed.
Account and Privacy: Used for managing visitor accounts and developing privacy policies.
Email: When using the WooCommerce website, all transactions will be notified via email, with clear instructions on each shopping process and status.
After all the settings are processed, the e-commerce website architecture is basically completed.
Step 3: WooCommerce Product Classification
After installing WooCommerce, we need to create product categories under the backend product menu, as shown in the following figure:
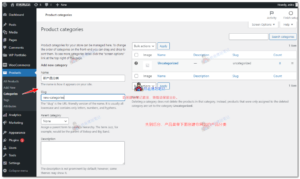
When creating a product category, fill in the Name, select whether you need a Panent category, and then add it.
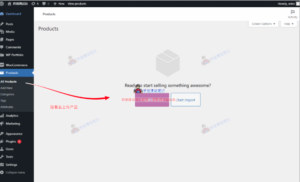
Step 4: Adding Products to WooCommerce
After creating the product category, we can upload the first product by clicking on “Add Product” in the product section.
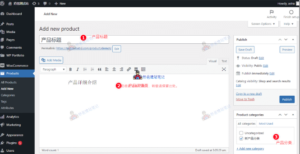
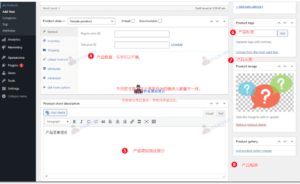
Then fill in the product title, description, category, and image information before publishing.
Please refer to the annotations in the upper and lower images for specific information. B2B customers will not display the shopping cart button as long as they do not fill in the product price. If the shopping cart button still appears in the theme you are using, please refer to this article: Several ways to remove and hide WooCommerce’s add to cart button
After release, you can visit the product front-end page to check the effect.